"Sometimes adventure calls and we ignore it. We miss the opportunity for a lifetime of memories. Go ahead, be adventurous" ~Maria Villanueva
Showing posts with label display card. Show all posts

November 26, 2010

A Pink Card And ATC Swap

What a crazy weekend this has been.  Lots of food, lots of cooking and lots to be grateful for.  Forget all the "things" I own, it's family and friends that make me happy.  I want to dedicate this post to my little sister whom I love, she was brave enough to cook the turkey this year at my mother's house and I love her for doing that. My mother was so happy to sit back and relax since my little sister did all the cooking, way to go Julie.

I'm joining Beverly at How Sweet The Sound for Pink Saturday, a weekly linky party that I like to join as I LOVE all things PINK. I'm also joining Cindy Adkins of Whimsical Musings  for a creative challenge.

This is a tutorial on this cute card I learned to make at the Scrapbooking Expo I went to a few weeks ago.  I love the way it displays.  I don't know what it's called but I guess we can call it "Display Card", why not.
Here's what it looks like all finished:
Isn't that ca-yoot? reminds me of a little pink dress I used to have when a was a little girl and I'm sure I had a little purse to match.....I've ALWAYS loved purses, my husband calls me the bag lady, haha.

What you'll need: scrapbook paper and an image
a paper cutter or scissors and glue or double sided tape
Some embellishments:

First, cut your cardstock to sizes below:

I laid them all out so you can see the pieces and their sizes but you don't have to write the size on them.

The 11" X 4 1/4 piece of cardstock is the base of your card.  You will need to fold this piece like in the picture below at three inches and at five inches: don't mind the piece of cardstock on the right, I know it's a little confusing, I used it to show the measurements of the places where you will fold, it was either that or writing it on the gray mat....and I wasn't about to do that.
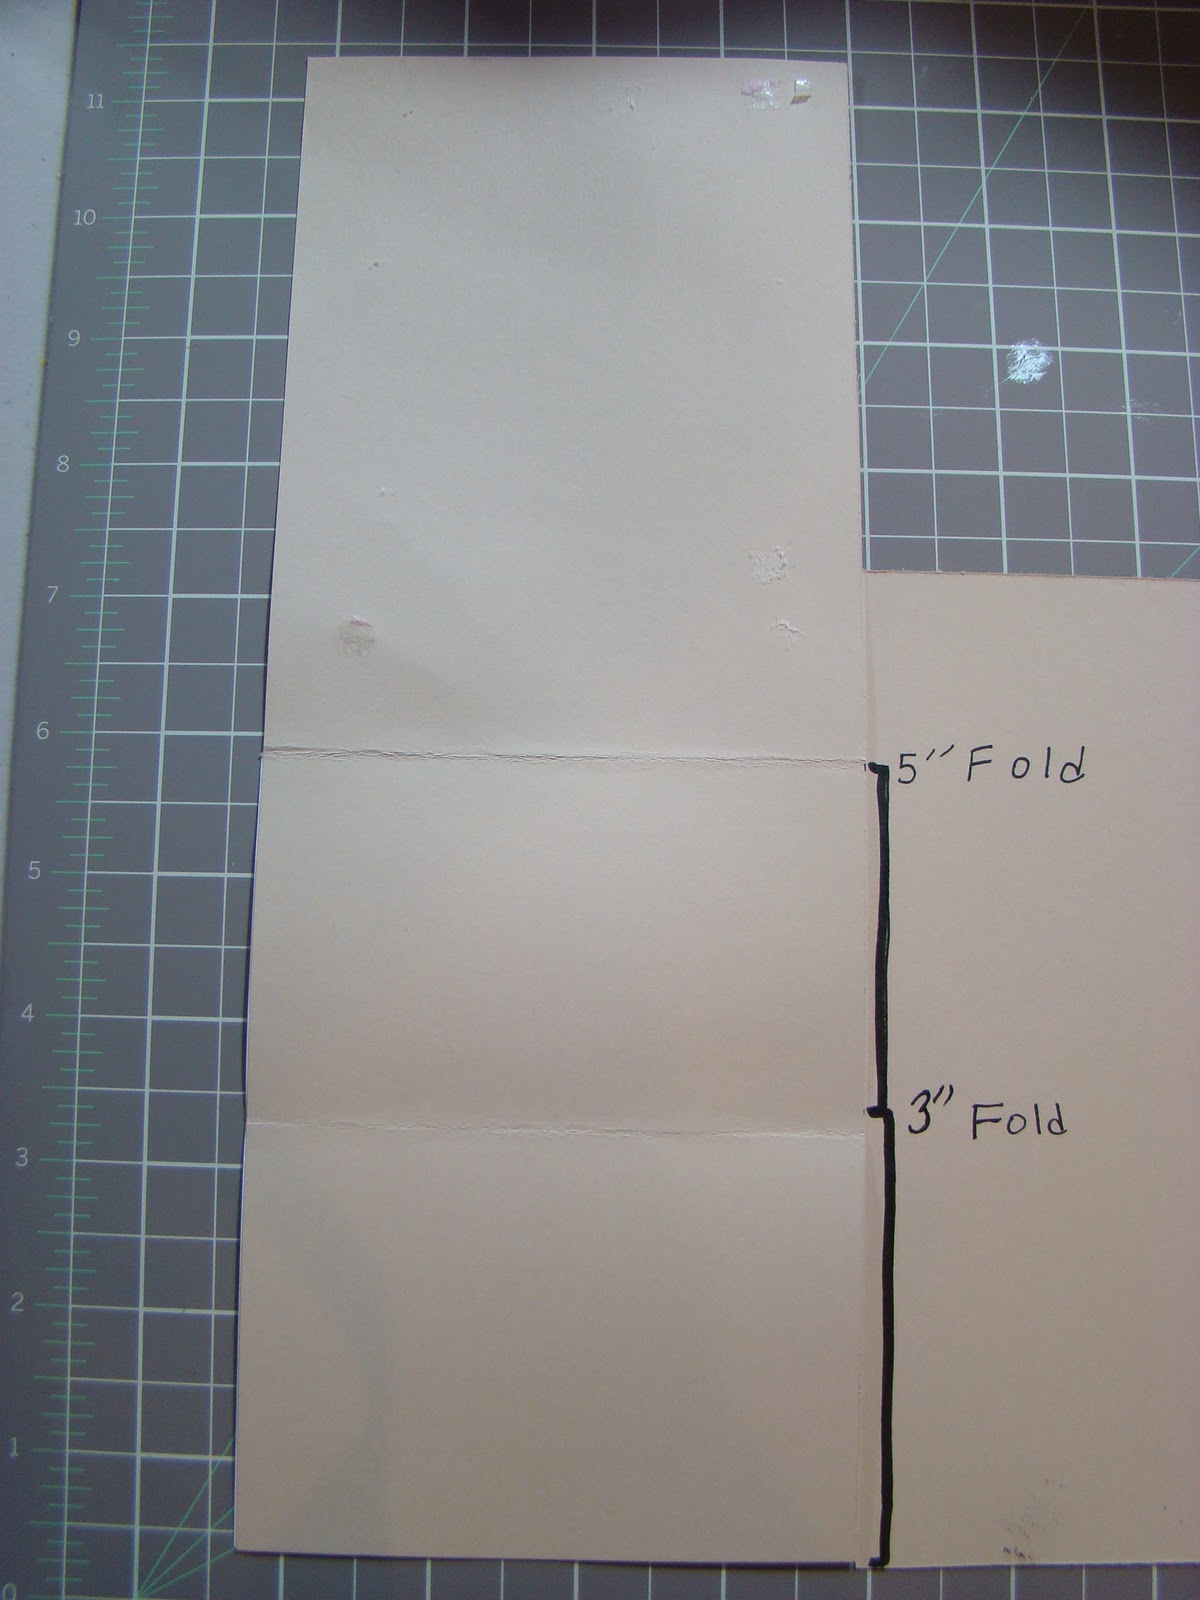
You will need to fold the card so that you can place the piece that will display your image, glue the bottom part only:

here's the card folded, the smaller strips of pieces at the base hold the card up. 

The next steps are just layering your pieces as the pictures below show, here's a side view:
and the front again:

 Now, on to my Artist Trading Card (ATC)
 The ATC card I received is from the talented Denisa of Full Of Gold. She made me this beautiful ATC that I just LOVE! I love the colors and the design.  I'm using this one as a book mark, it will be nice to see it every time I open a favorite book.

It's made with fabric and a very soft felt.  She embroidered right on the card! check out the texture on it:


 And the back looks awesome too:


 And this is the card I sent her, it's called "Flowers".  I embossed it with gold copper and green embossing powders.  It's a powder made out of wax that melts when you heat it.  I used a vase paper punch and four small flowers.  


If you'd like to see more ATC cards, or, if you'd like to join in on the ATC swaps , head over to Blissfull ATC Swap .

Hope you are all having a wonderful weekend with family and friends, thanks for hanging out with me.  Come back soon!


LinkWithin

Related Posts with Thumbnails