This is a very easy tutorial, don't get turned off by all the steps below, trust me, it's actually quite easy.
Is that not the cutest little book pendant?
I saw these pendants for sale at the library gift shop and, of course, I had to make my own. Besides, they were selling them for $30 dollars!!!..... I KNOW!!!.... Luckily, they are very easy to make and will cost an average of a dollar or two provided that you have most of the supplies on hand.
Here's what you'll need:
Scrapbook card stock, regular white copy paper 8 1/2 inch by 11 inch, ribbon, gold leaf pen, glue and some paper glaze (or embossing powder), an eyelet and eyelet setter.
some jewelry finding and jump rings and a cord:
Create the pages that go inside the book:
First, fold your white copy paper in half, turn 90 degrees then fold again and turn 90 degrees, do this a total of four times and you'll end up with a 2 3/4 inch by 2 1/8 inch folded paper.....sorry lots of measurements. Cut the corner with scissors to measure a piece that's 1 inch by 3/4 inch. See picture below, it shows the corner that was cut (also shows the measurements of the pieces):
Next, cut all the folds all the way around:
You will end up with 16 little pages that are 1inch by 3/4 inch:
Gather your pages and place them inside a clip. Drop some hot glue gun on a mat and dip your pages in to coat the back side with the hot glue (binding):
This will allow your pages to stick together like a book
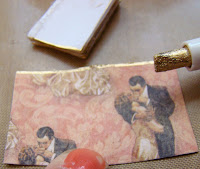
Next, take your gold leaf pen and run it all around your pages:
Next, cut a cover sheet out of scrapbook card stock paper by using your pages to measure the area you need. Run your gold leaf pen all around your cover sheet:
Fold your cover sheet in half. Add some glue over your pages and spread, do top and bottom and place them inside your cover sheet:
essentially you are gluing the first page to your front cover and the last page to your back cover.
Close your book and allow glue to dry.
At this point, add Paper Glaze to the front and back covers and let it dry over night so that it will give it a nice thick shine and protect it from the elements. If you don't want to use the Paper Glaze, you can emboss the front and back instead. To see an embossing tutorial, go here.
Punch a hole on the back page to add your eyelet. With your eyelet setter (I'm using a Crop-A-Dile) set your eyelet on your back cover sheet:
It will look like this:
Add some jewelry finding and run a cord through to hand your pendant from. My cord is made of leather and it's 9 inches long, just long enough to fit comfortably around my neck.
Here's what it looks like opened:
To add a clasp to your necklace go here.
Here are other versions of this miniature book:
Thanks for coming by. Hope you have an awesome week!


They are all gorgeous!!!!
ReplyDeleteBut, my favourites are the 'mystery novel' and the one with the japanese girl!
What a good tutorial,it seems easier when broken down step by step.I may have to try this if I ever get five minutes.lol!
ReplyDeleteHi Maria!
ReplyDeleteI did receive my pendant - thank you so much! I love it! It's been really busy here, but I did blog about my pendant (and gave a shout out to your blog) today. so, it's perfect timing for your tutorial.
Rinda
They're all so pretty! But you know which one is my favorite. ;)
ReplyDeleteWhat a lovely project and so personal. Great tutorial.
ReplyDeleteOh I like these and very easy indeed. I've got to make these. I certainly will use this post as a tutorial when I get ready to make a miniature book pendant. Awesome! Thanks for the tutorial and for stopping by my blog. I too will follow you because I like like your blog and look forward to reading your posts. Thanks again.
ReplyDeleteWoo Hoo, I just made it an even 200 followers. Yay for you!
ReplyDeleteI think that this is wonderful. Thanks, for the tutorial and I will definitely have a go at making one of these. All ate beautiful but the Frida one stand out :)
ReplyDeleteI remember this one - great gift ideas for mothers day...
ReplyDeleteLove these! I just love seeing what you'll come up with next; you have the best ideas!
ReplyDeleteThis is such a fun idea! Anything mini is adorable! I hope you'll come over and link it up today :)
ReplyDeletehttp://embellishinglifeeveryday.blogspot.com/2011/05/craft-catwalk-29.html